Installation on macOS
SCADE Version 2.2 BETA
Introduction - Up and running in about 10 minutes
Supported Compilers and OSs in SCADE 2.2
| System Component | Min Version |
|---|---|
| Swift Compiler on iOS | 5.3.x |
| Swift Compiler on Android | 5.3.x |
| iOS | 10.x |
| Android | 5.0 |
System Requirements
| System Component | Link to download |
|---|---|
| macOS | |
| XCode needs to be installed | <https://xcodereleases.com/> |
| Android Studio | <https://developer.android.com/studio> |
| Android NDK needs to be installed | |
| Android SDK needs to be installed |
The installation of SCADE simply involves three steps:
Step One - Download and Install SCADE
- Download the latest SCADE version by clicking here beta.scade.io/download/
- Double-click on the downloaded
.dmgfile to install it to the directory of your choice
Use Installation Directory without spaces
Currently, we have problems if the installation directory you install SCADE in contains spaces. Please choose a directory without spaces, otherwise SCADE will not compile. We are currently fixing this issue.
- Run SCADE from your desired directory. If your choice is the Applications directory, you can also find SCADE using Command + Space and searching for SCADE
Step Two: iOS setup
Install Xcode
- Install Xcode using the most recent stable version (via the Mac App Store or web download).
- SCADE runs smoothly on the iOS platform just by using the default Xcode setup with no additional dependencies needed for its execution.
Step Three: Android setup
Install Android Studio
- SCADE needs the Android SDK, NDK and an Emulator installed to run an Android application
- Download and install the latest Android Studio IDE so that you can always set the targetSdkVersion (also known as target API level) of your app bundle to the latest Android version required for Google Play apps
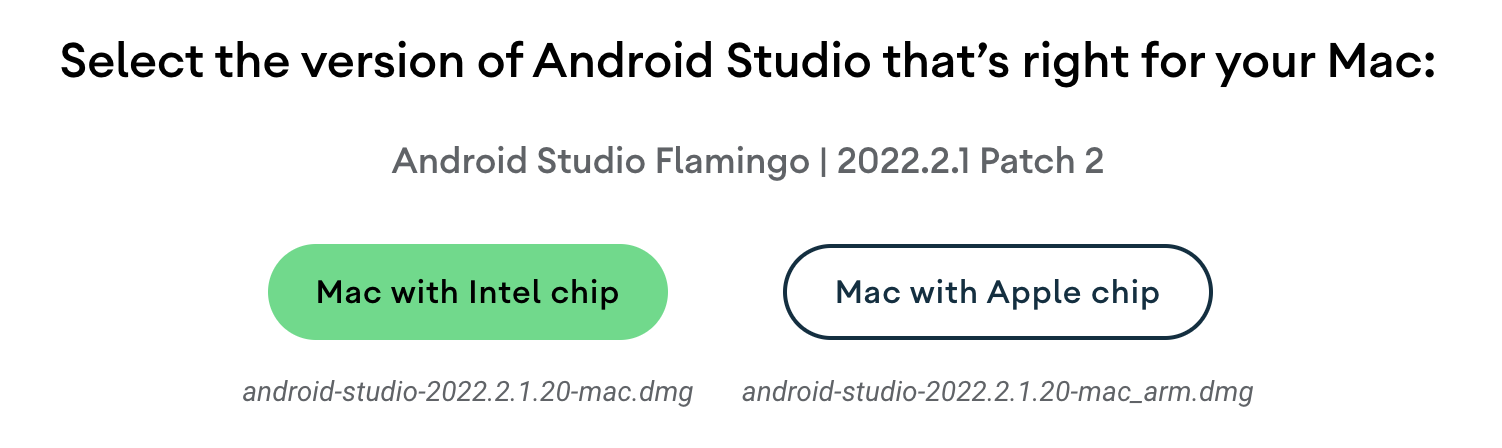
- While trying to download Android Studio, always select the version of Android Studio for your Mac based on the type of processor it uses:
Configuring Android SDK
After installing Android Studio, please run the SDK setup to configure all the components we need for development
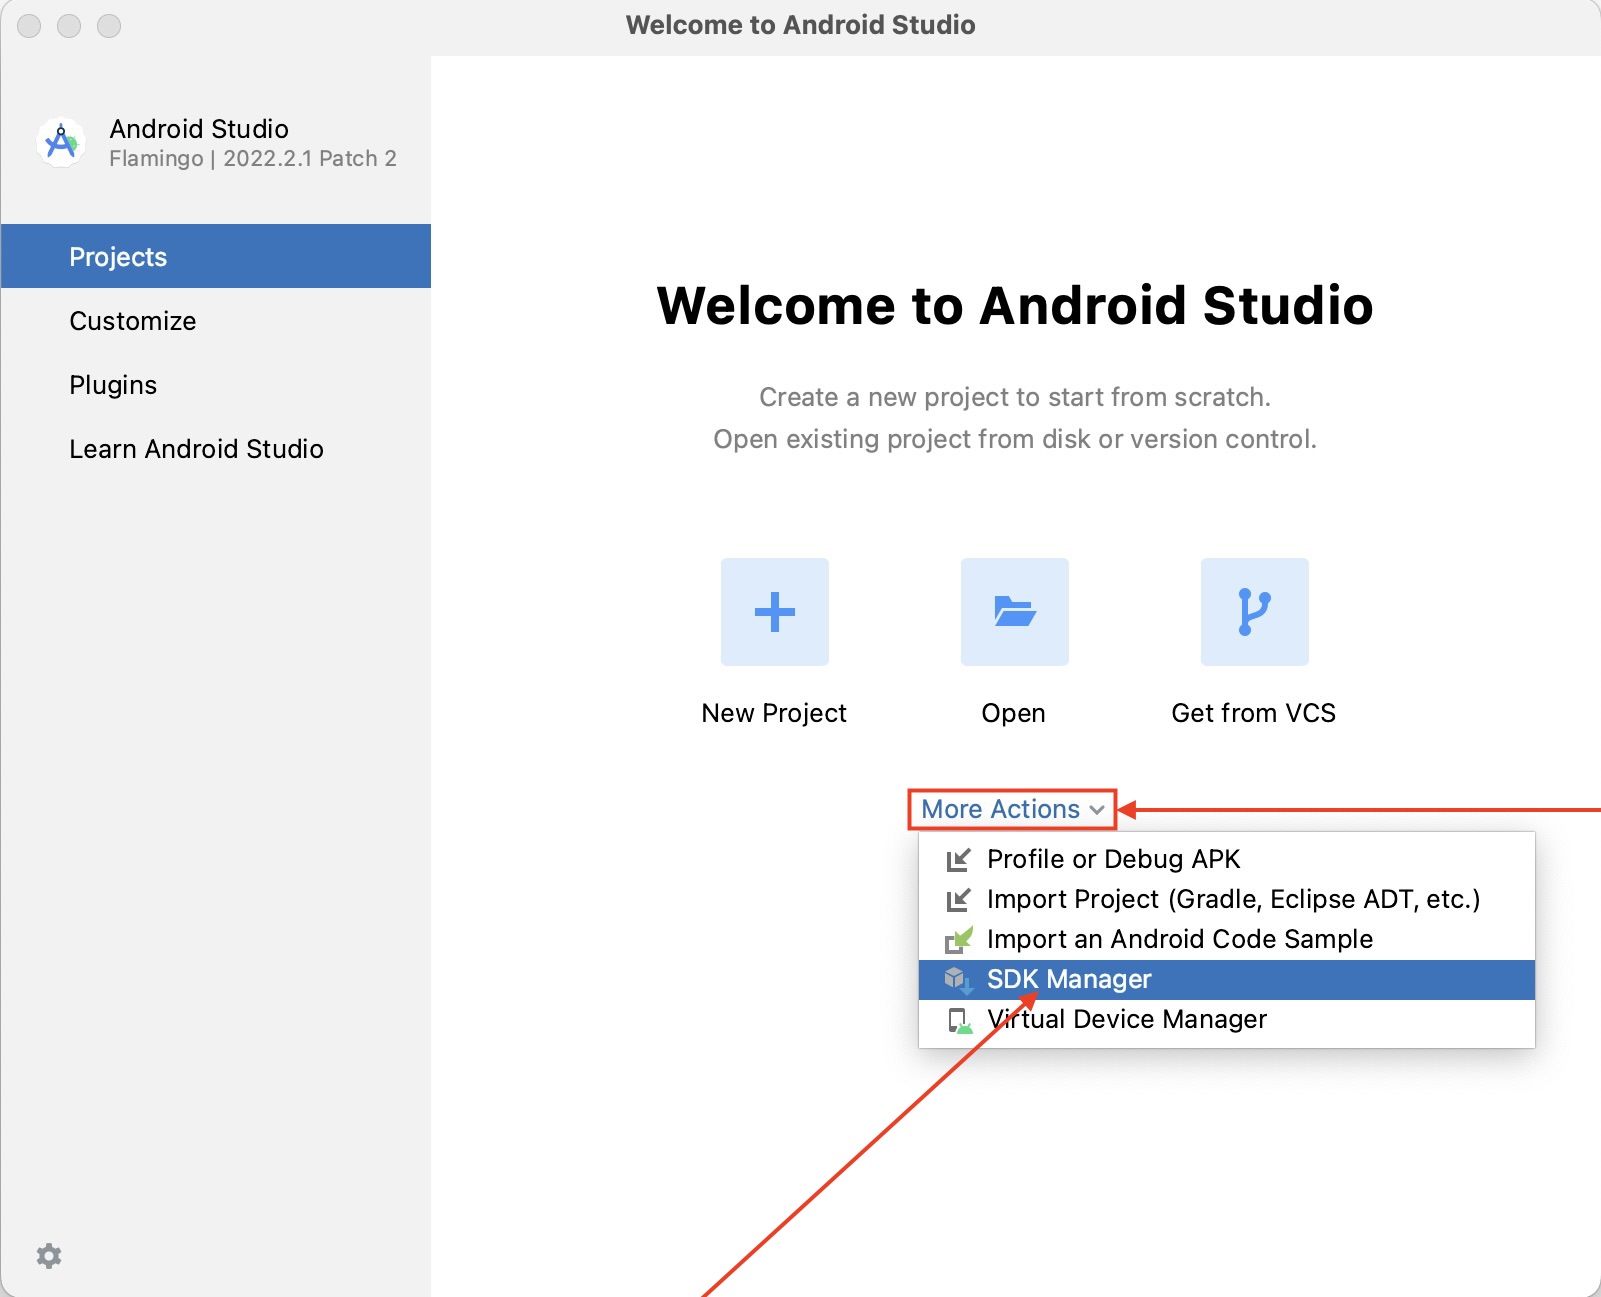
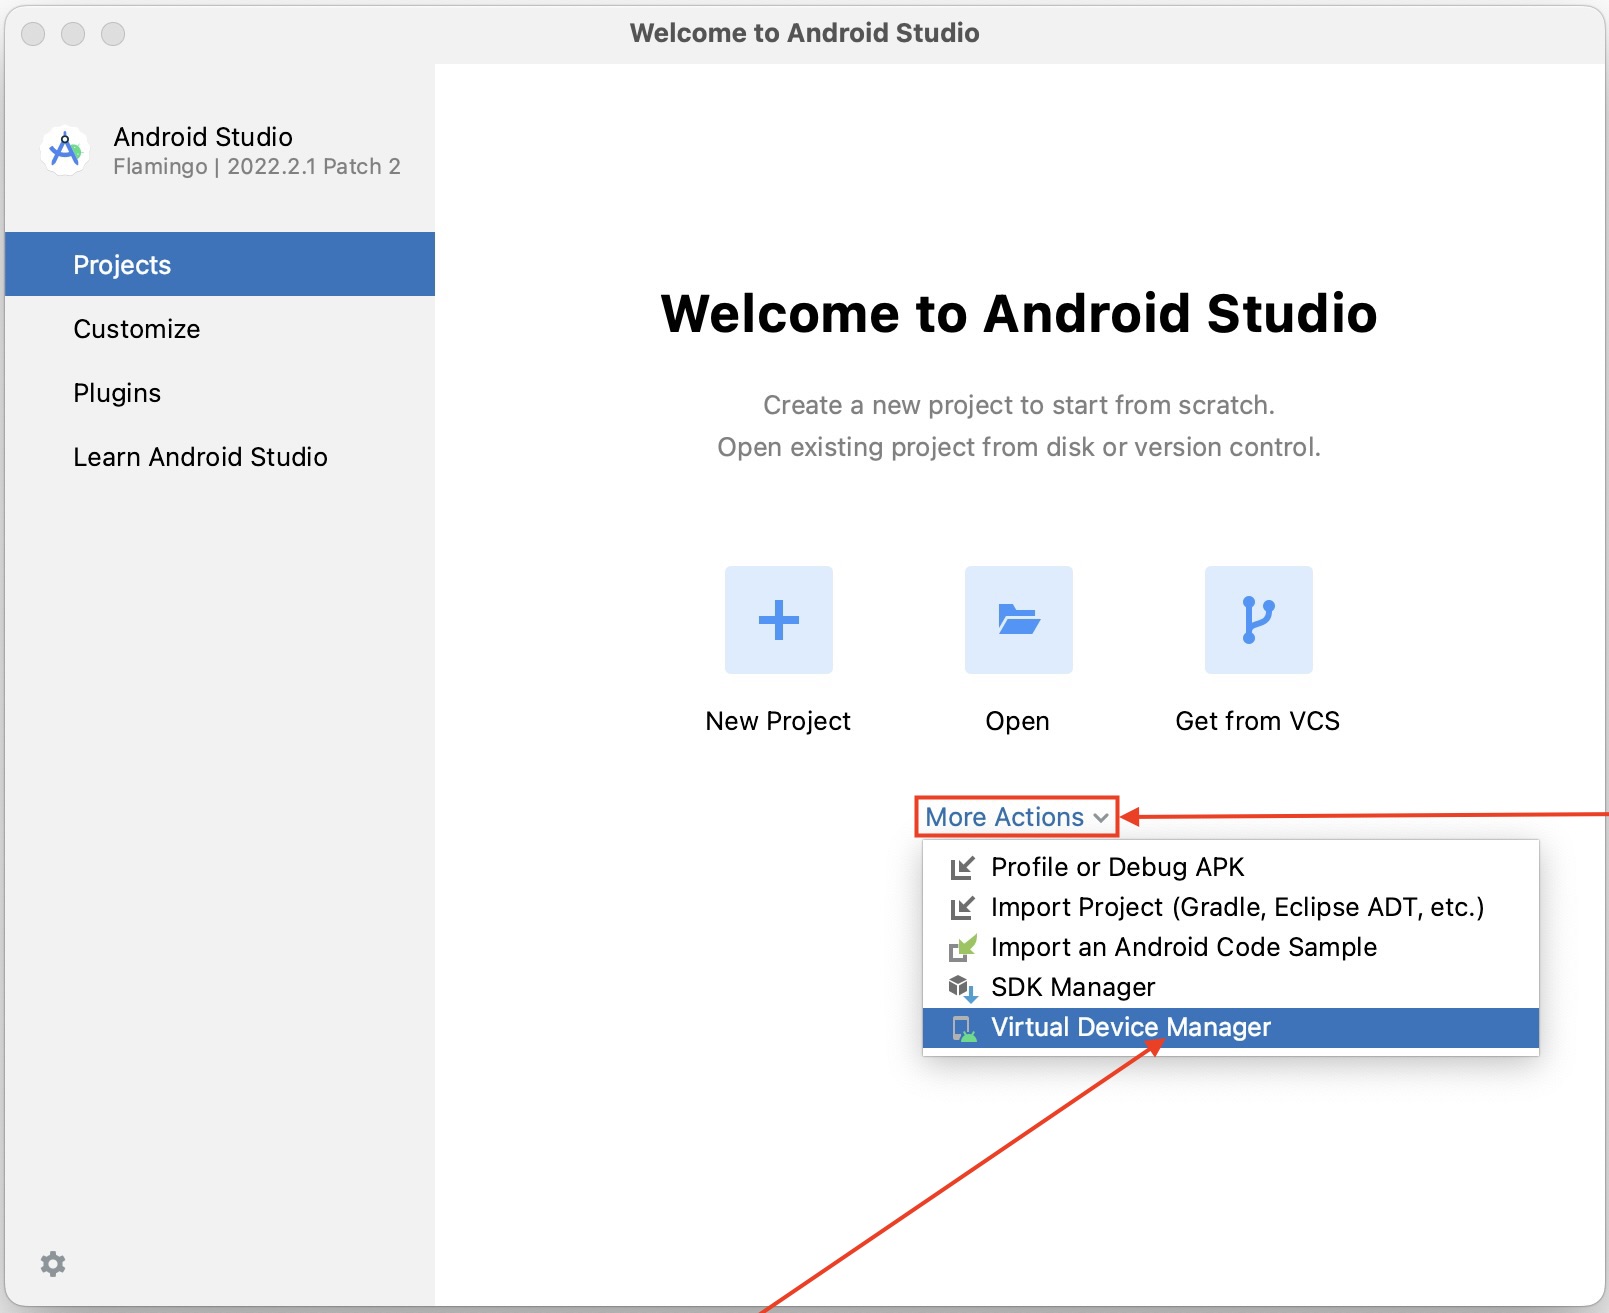
- If you downloaded Android Studio Flamengo, select the More Actions button on its home screen to open the SDK Manager.
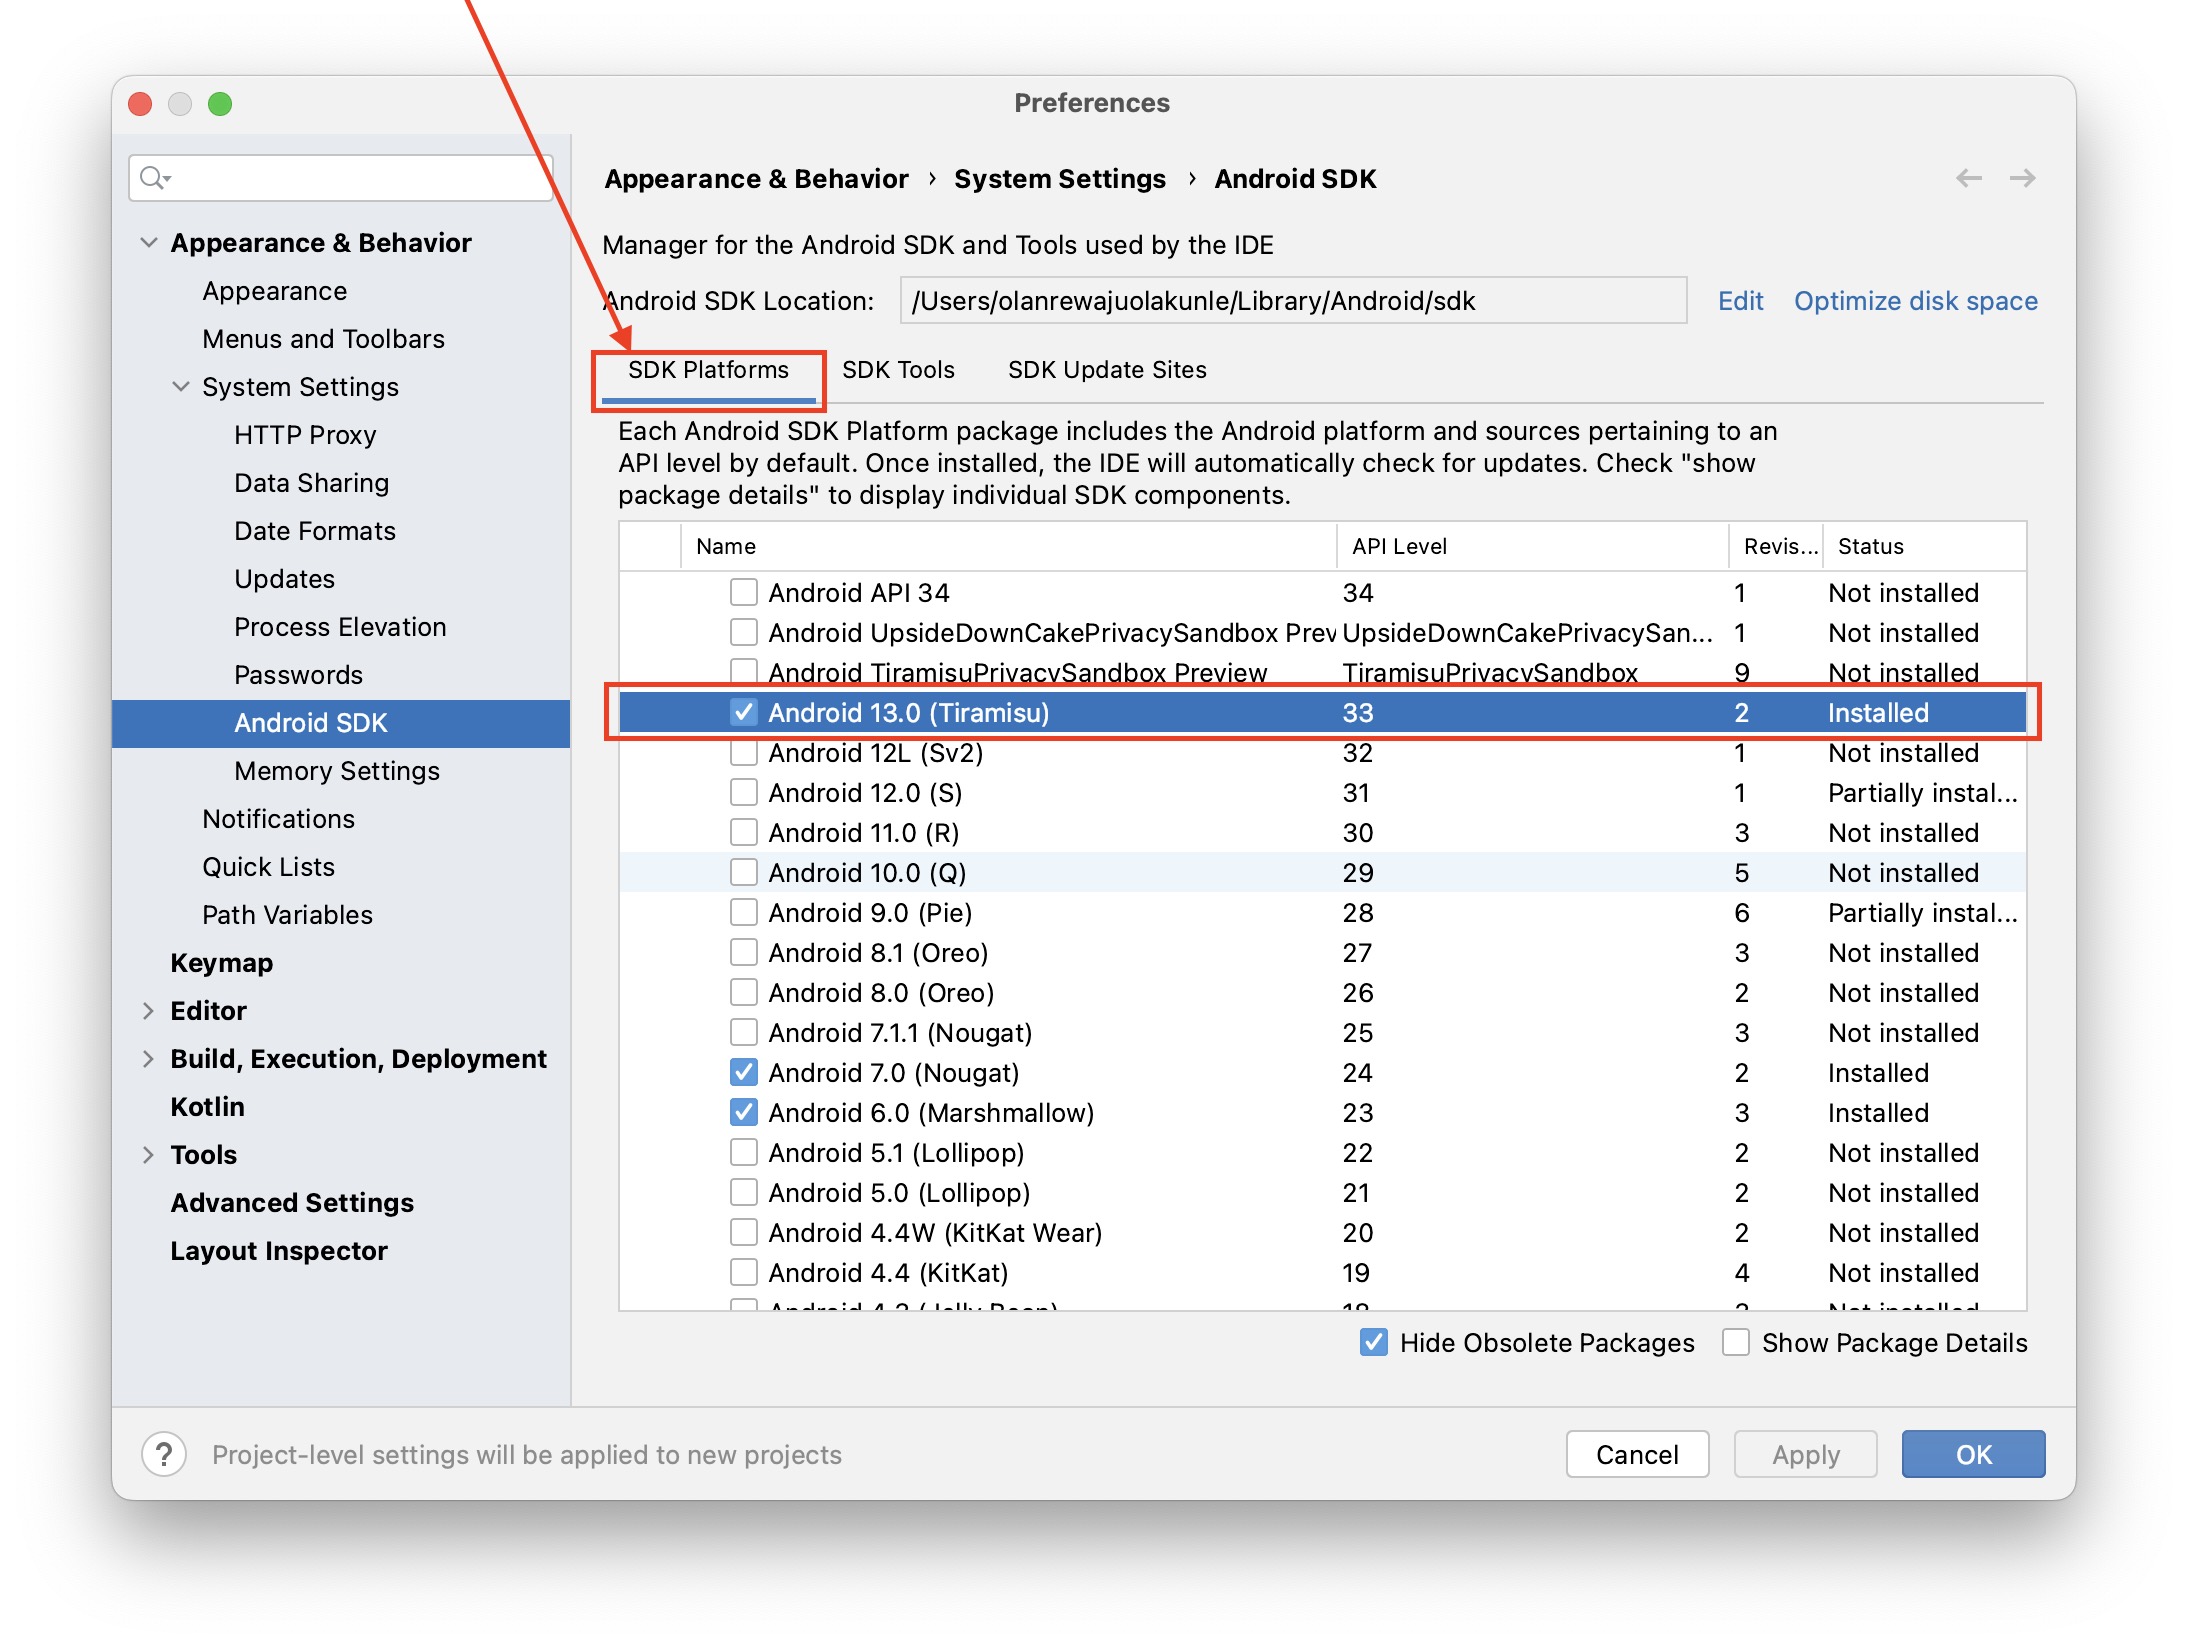
- In the SDK Platforms tab, you must install at least one version of the Android platform so you can compile your app. We recommend using the latest platform version as your build target (targetSdkVersion) to provide the best user experience on the latest devices. For instance, we installed the Android 13 SDK (also known as Android Tiramisu Preview) as it's currently the most stable Android version. To download a version, select the checkbox next to the version name.
You can still run your app on older versions; however, you must build against the latest version to use new features when running on devices with the latest version of Android.
- In the SDK Tools tab, select the following components:
- Android SDK Platform-Tools
- Android SDK Build-Tools
- NDK (Side by side)
- Google Play services
- Google Play Licensing Library
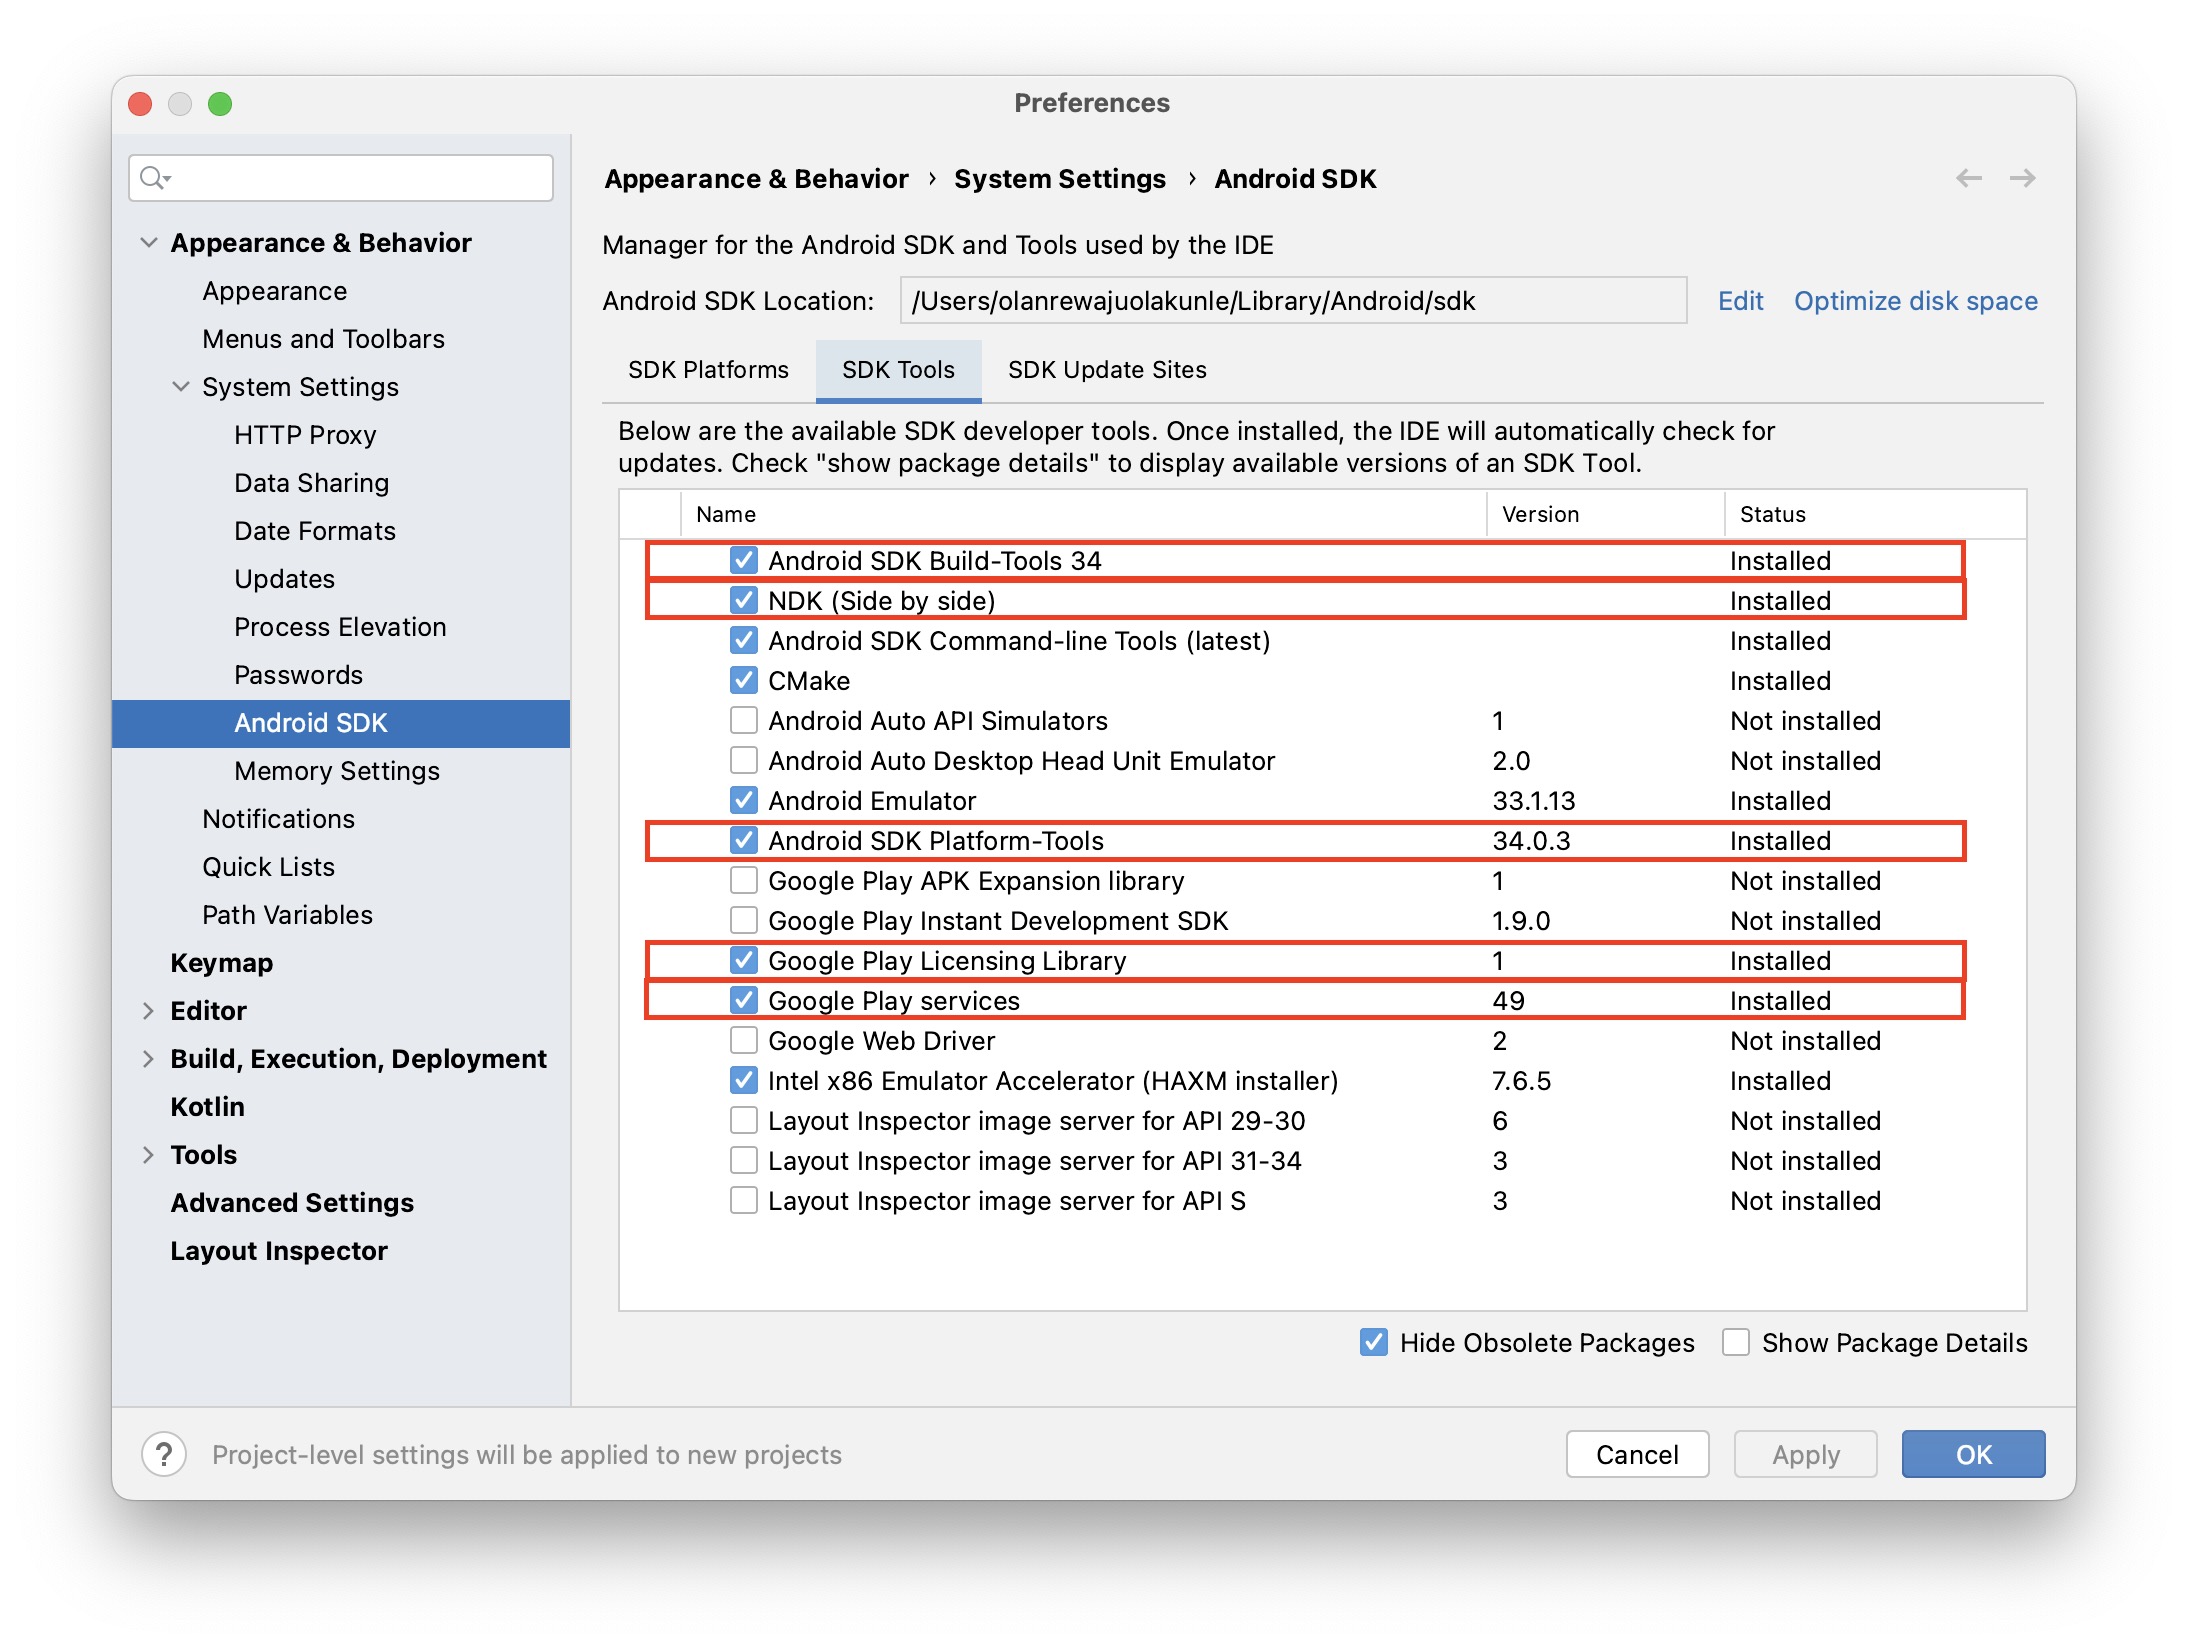
- Click Apply and wait for selected components to be installed
Set up the Android Emulator
To run the Android emulator, you have to create a virtual device and download a system image.
We recommend the following to achieve the aforementioned:
- Pixel 4 - popular model and reference model from Google
- 64 bit - all new Android apps need to be deployed as 64 Bit
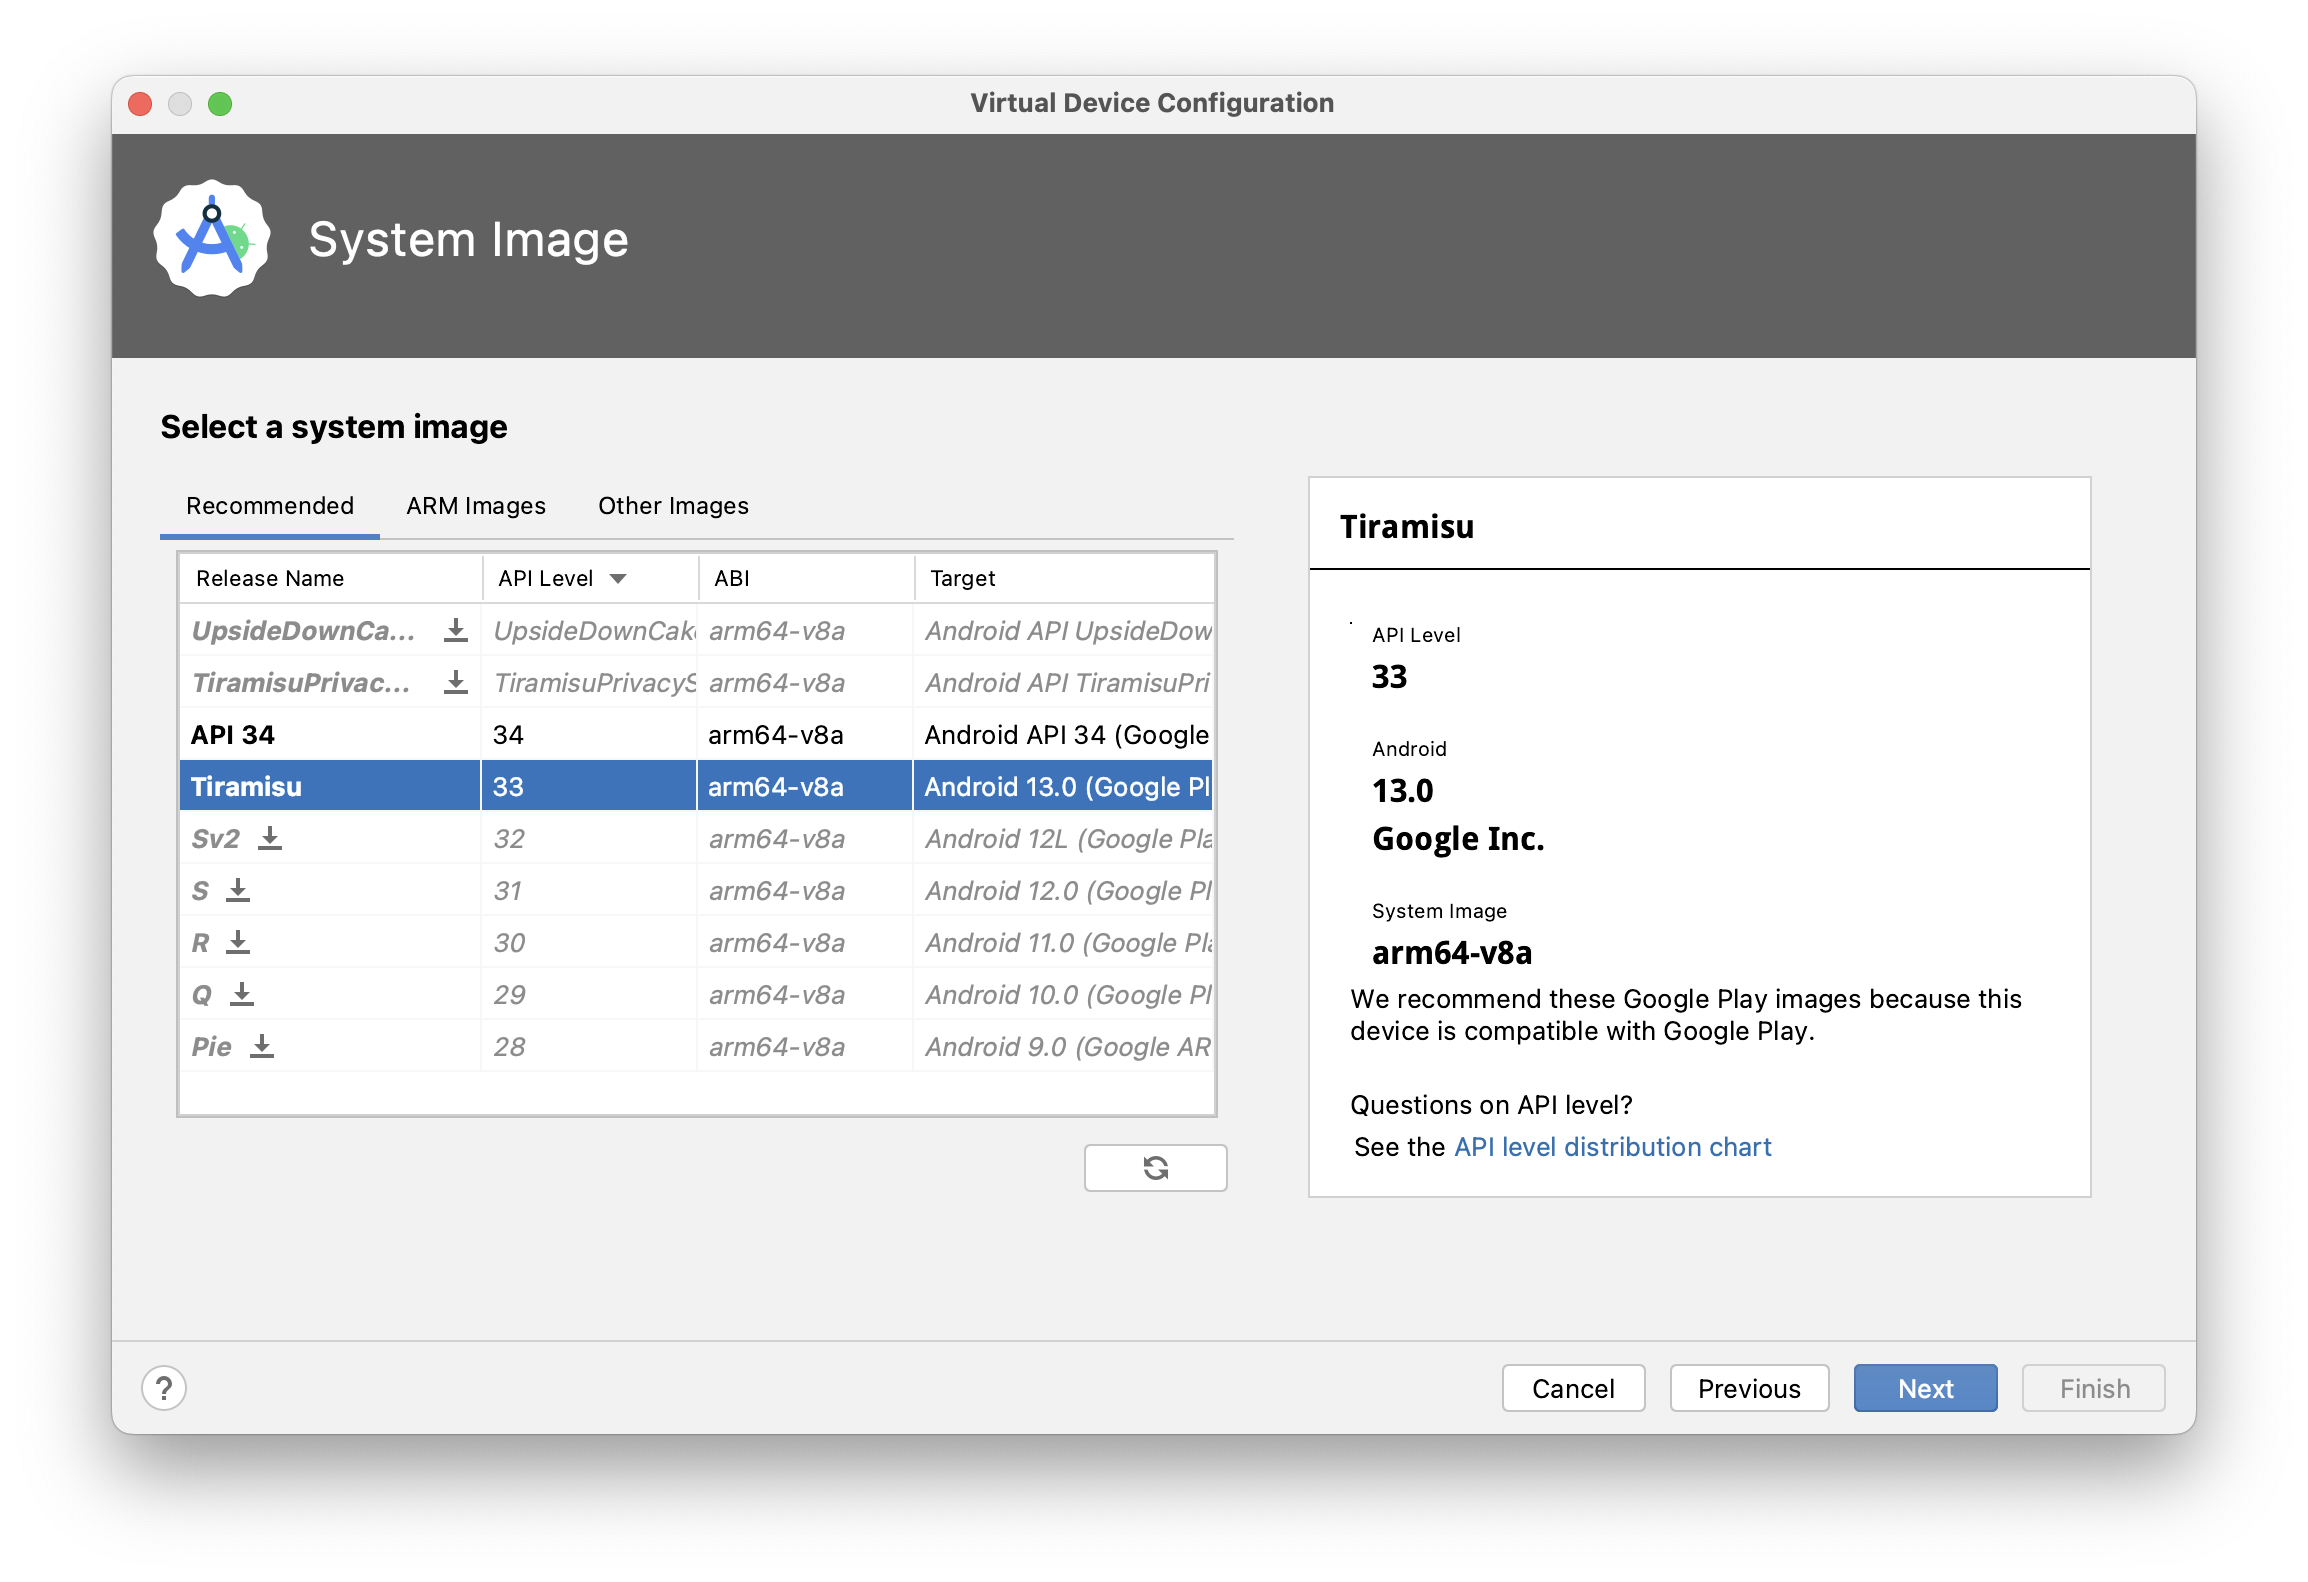
- Select Tiramisu (Android 13.0) as the Emulator System Image. This will allow you to run your app on a very large number of Android devices. Though other API Levels are also supported, API 33 has some very convenient updates.
Follow these steps to create an Android emulator:
- Select the More Actions button on the home screen once again to open the Virtual Device Manager and setup the Android Emulator of your choice
-
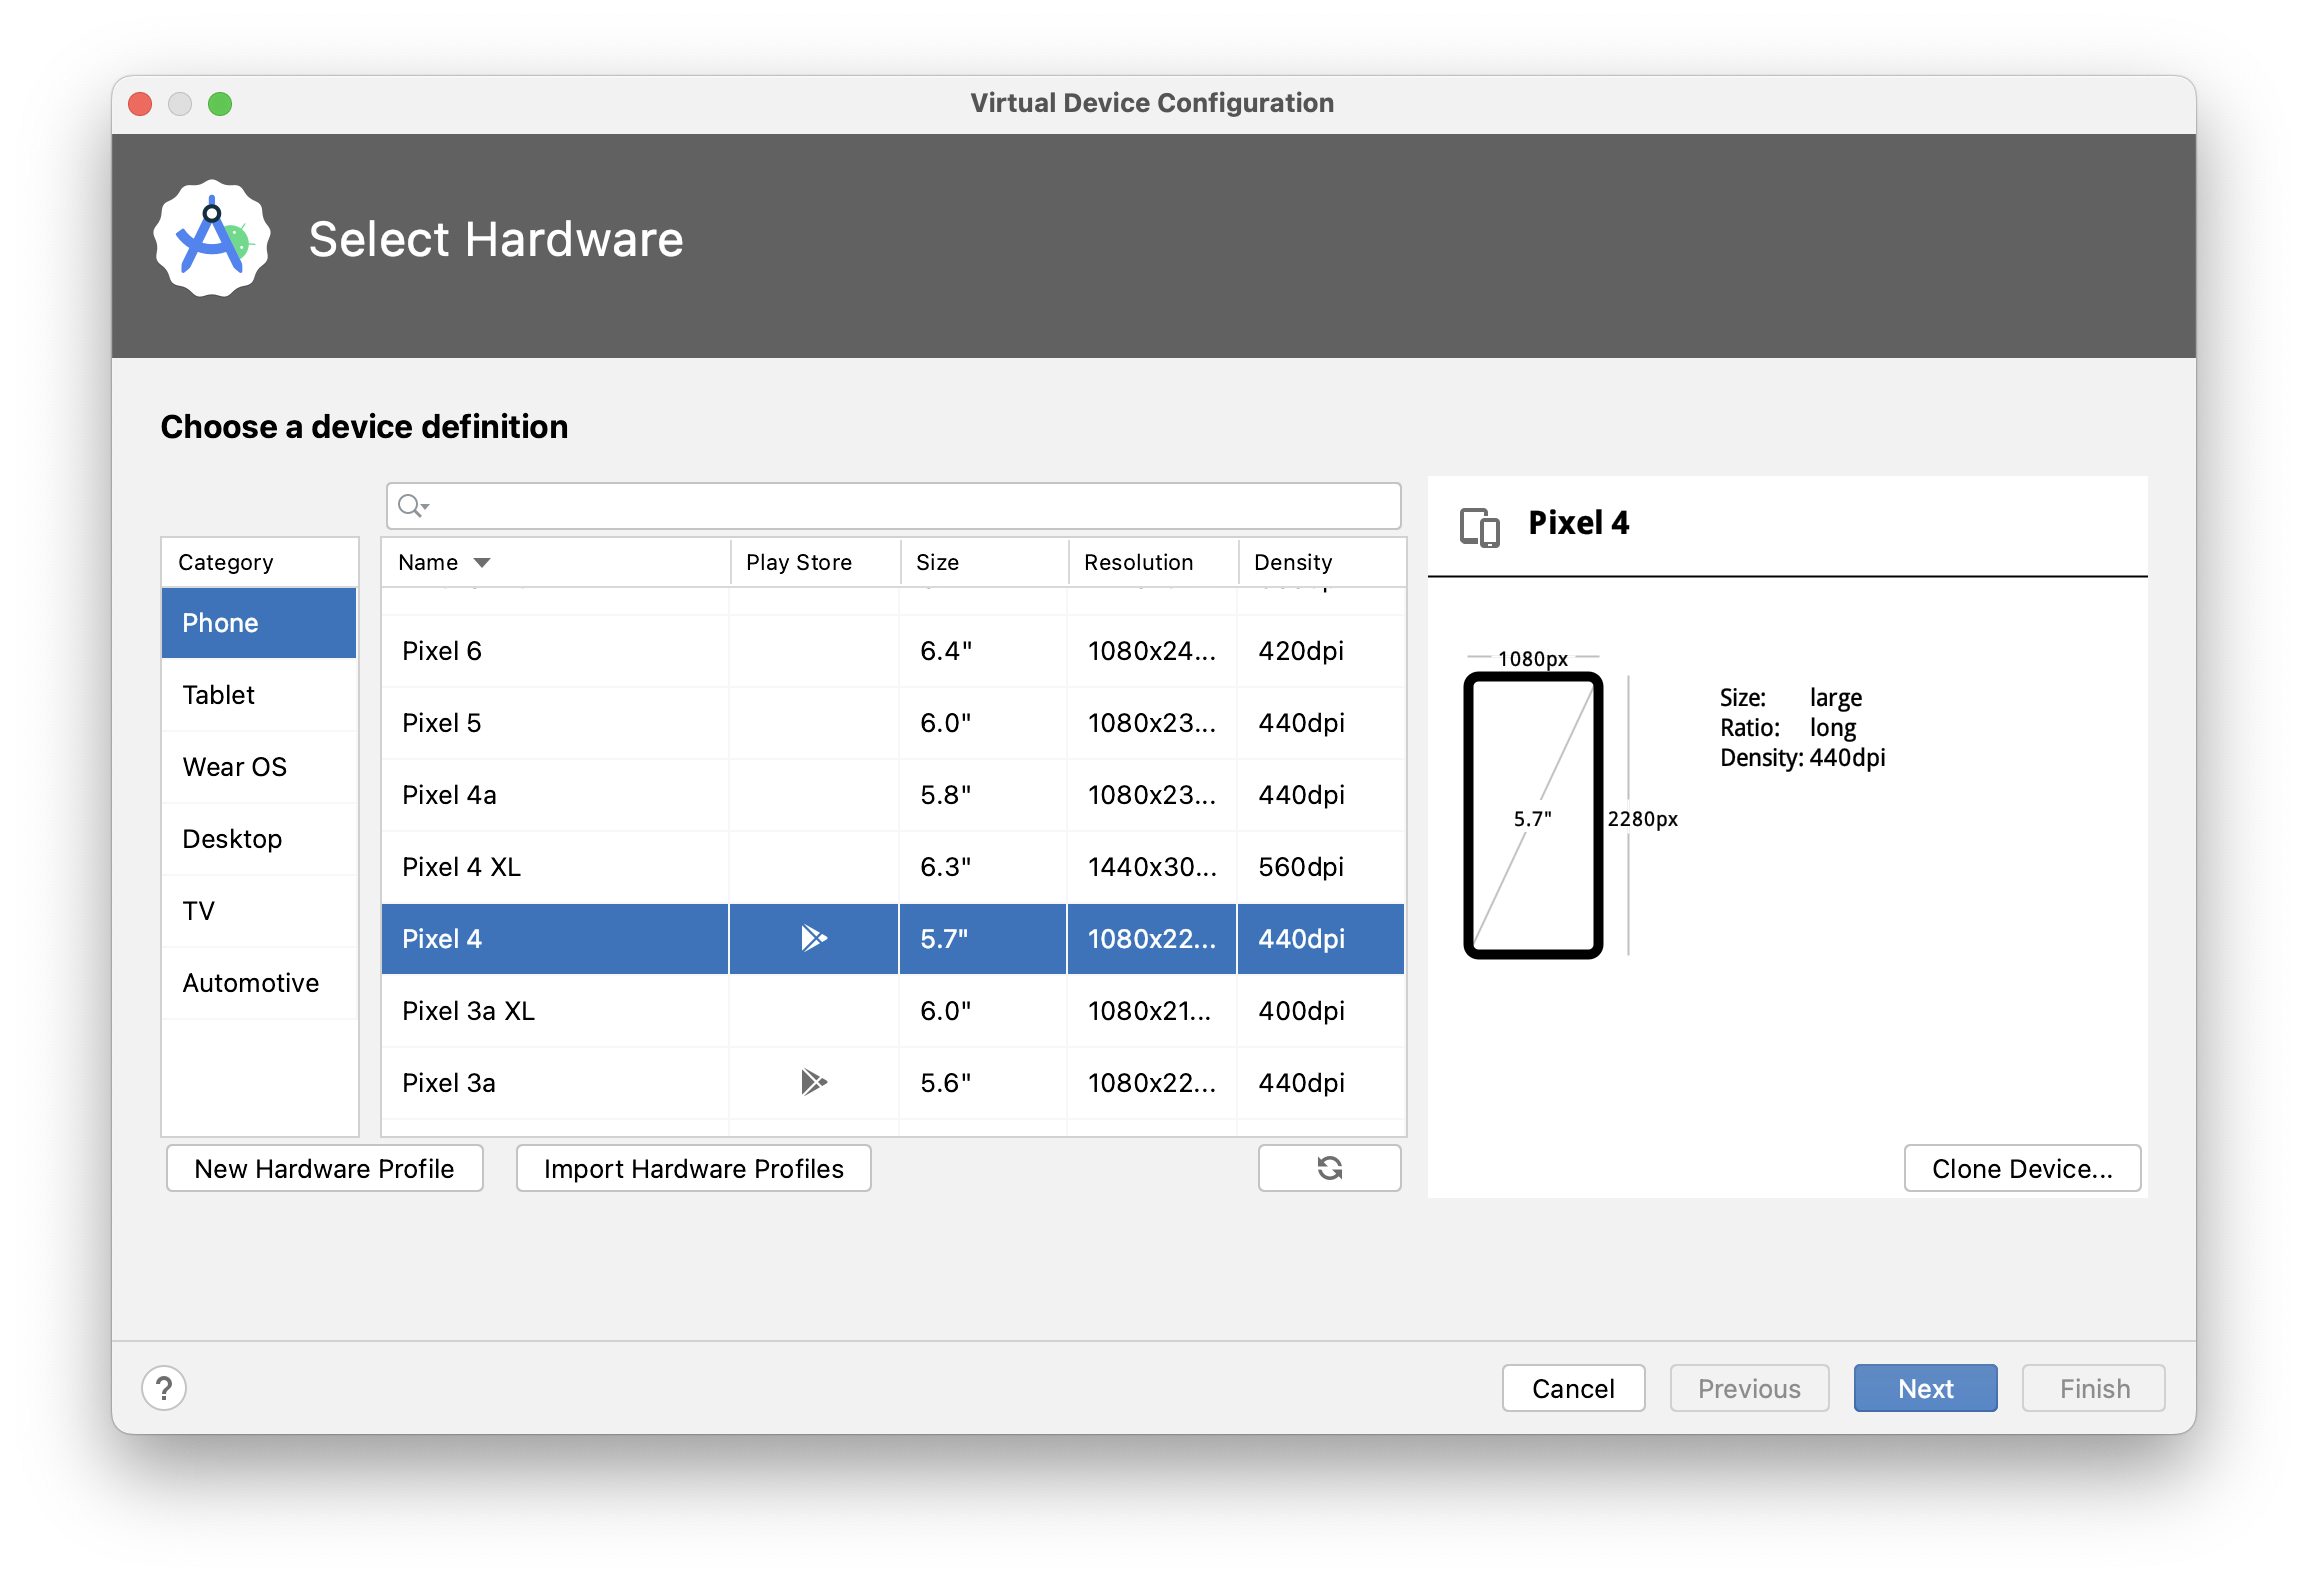
On the Virtual Device Manager page, press the Create Device button to select a device definition.
-
Select the Pixel 4 model and click on Next.
- Download and select the Tiramisu 33 system image. Then press Next.
- Assign a name to your newly created Android Virtual Device.
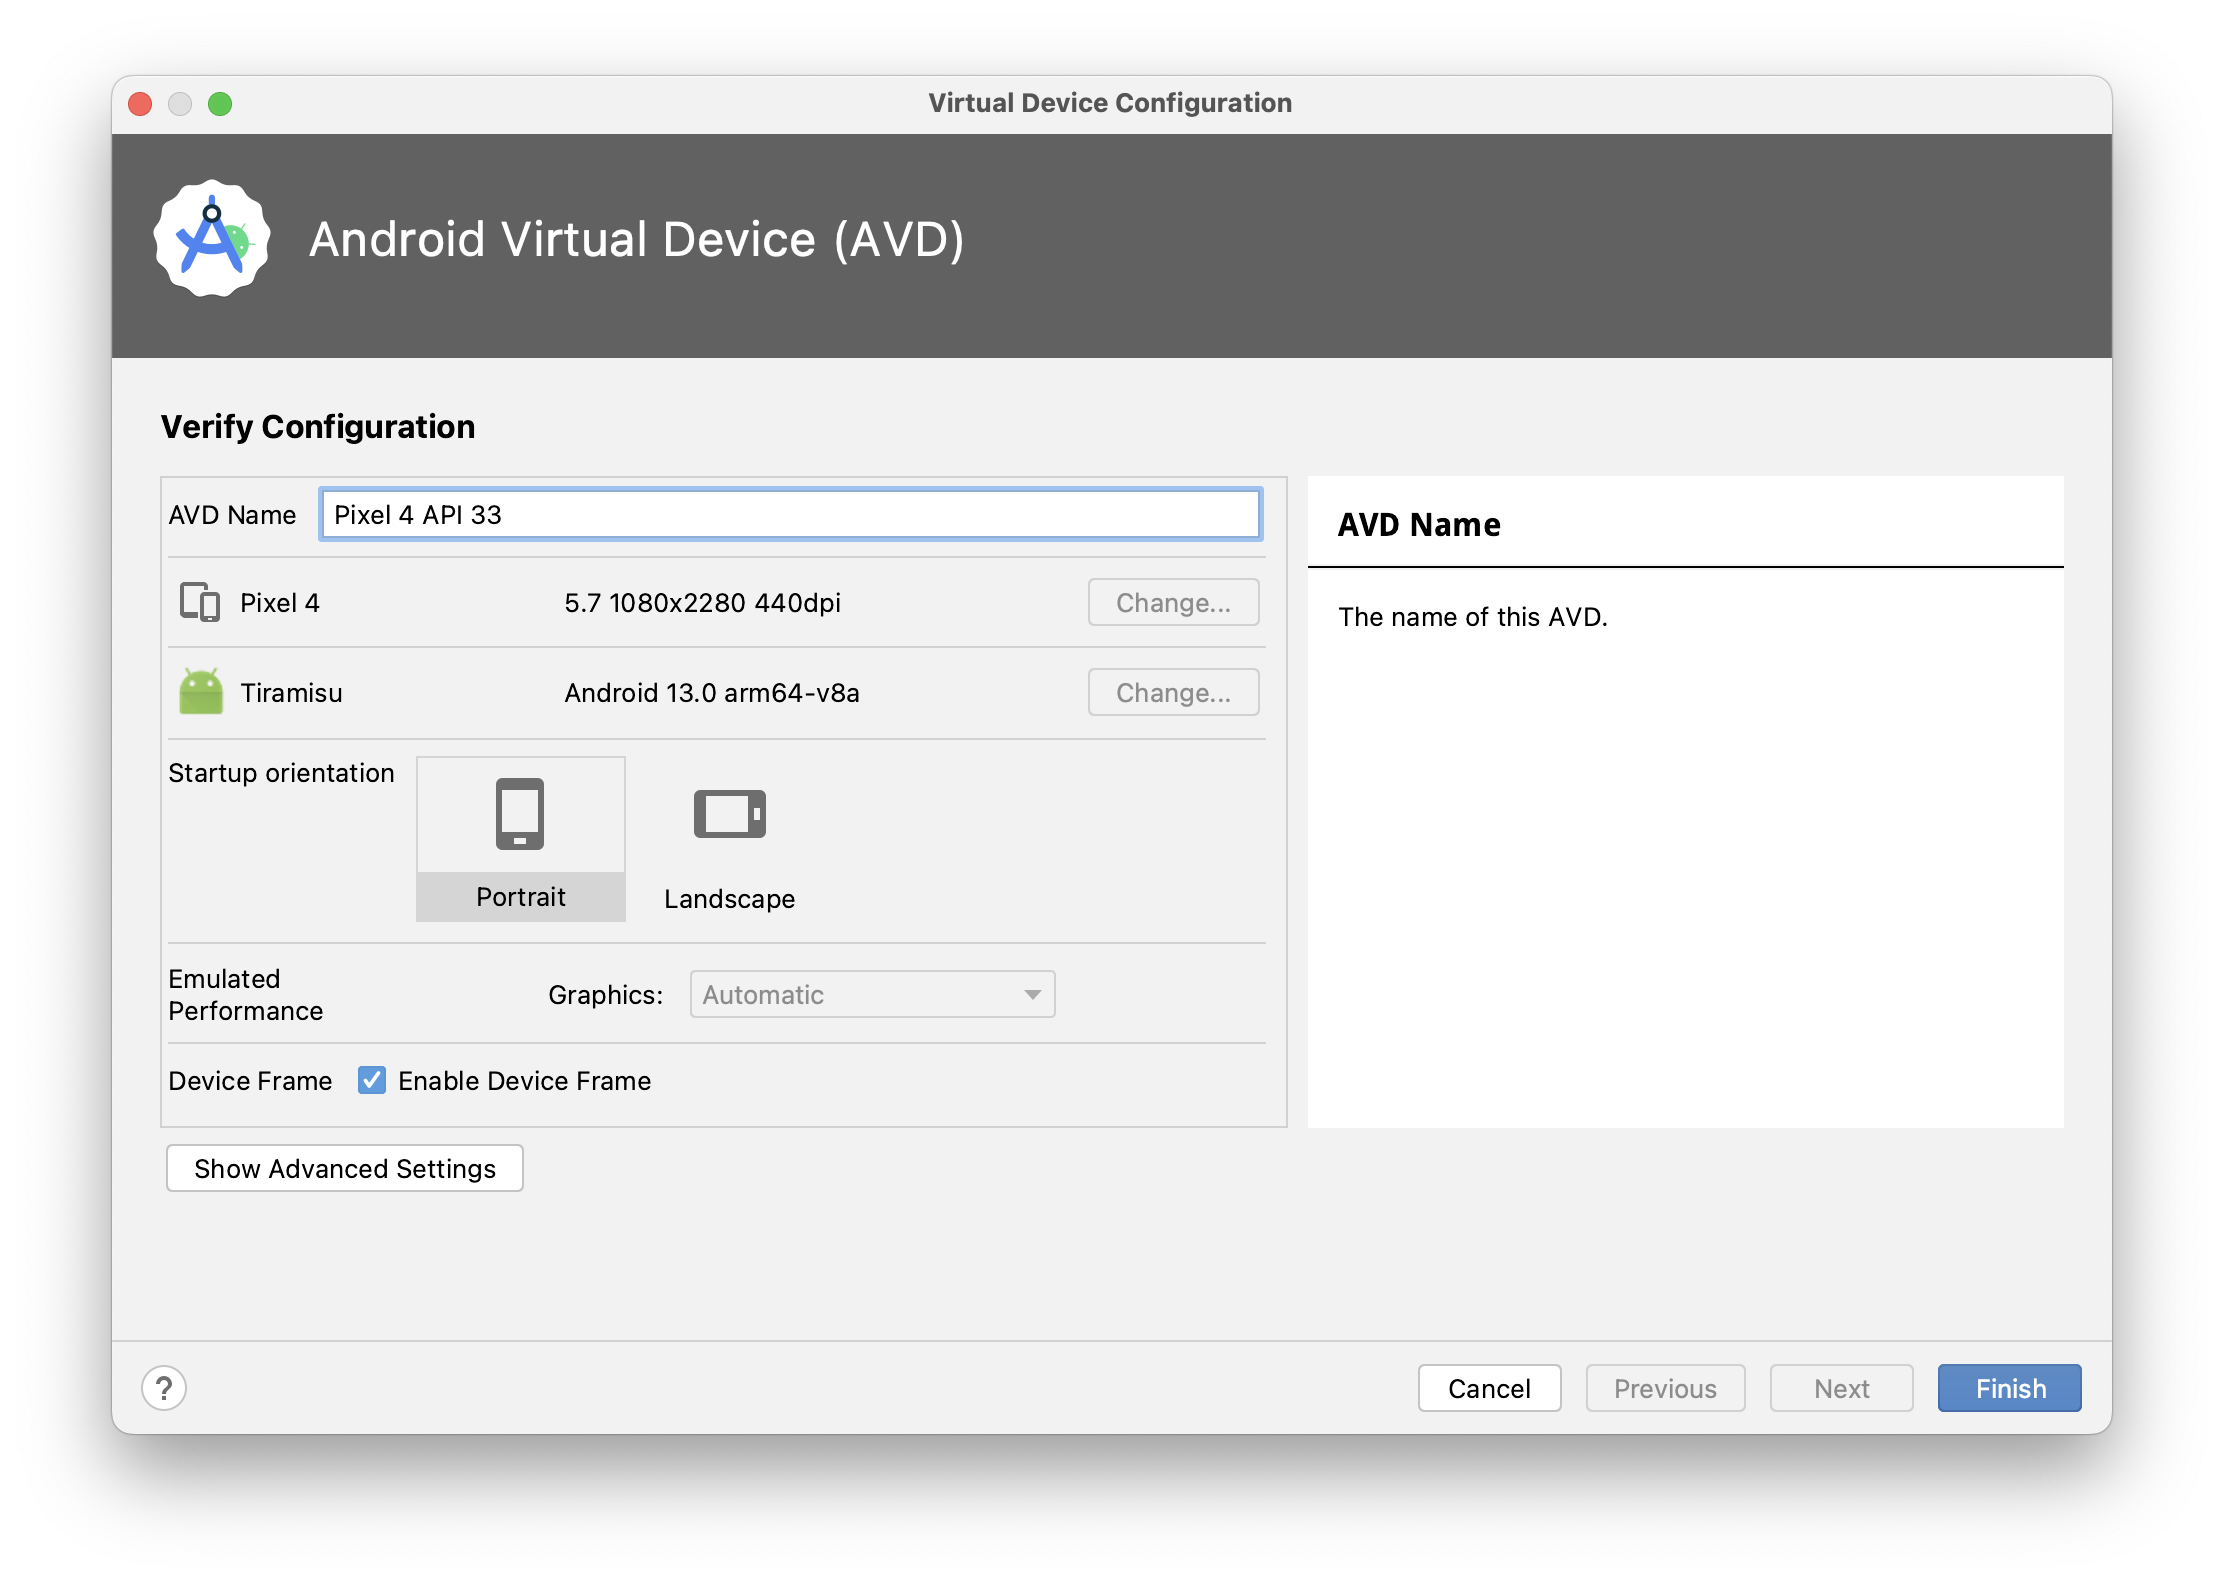
👍 Congratulations, you have successfully downloaded and installed your Android emulator!
Configure Android support
Now configure the SCADE settings. In the menubar at the top-left corner of your SCADE app, choose Scade > Preferences > Settings to set directories paths from the above installation steps:
| Software | Path |
|---|---|
| Android SDK | /Users/<<Username>>/Library/Android/sdk/ |
| Android NDK | /Users/<<Username>>/Library/Android/sdk/ndk |
Please edit the Settings.yaml file to set the paths to the SDK and NDK like this
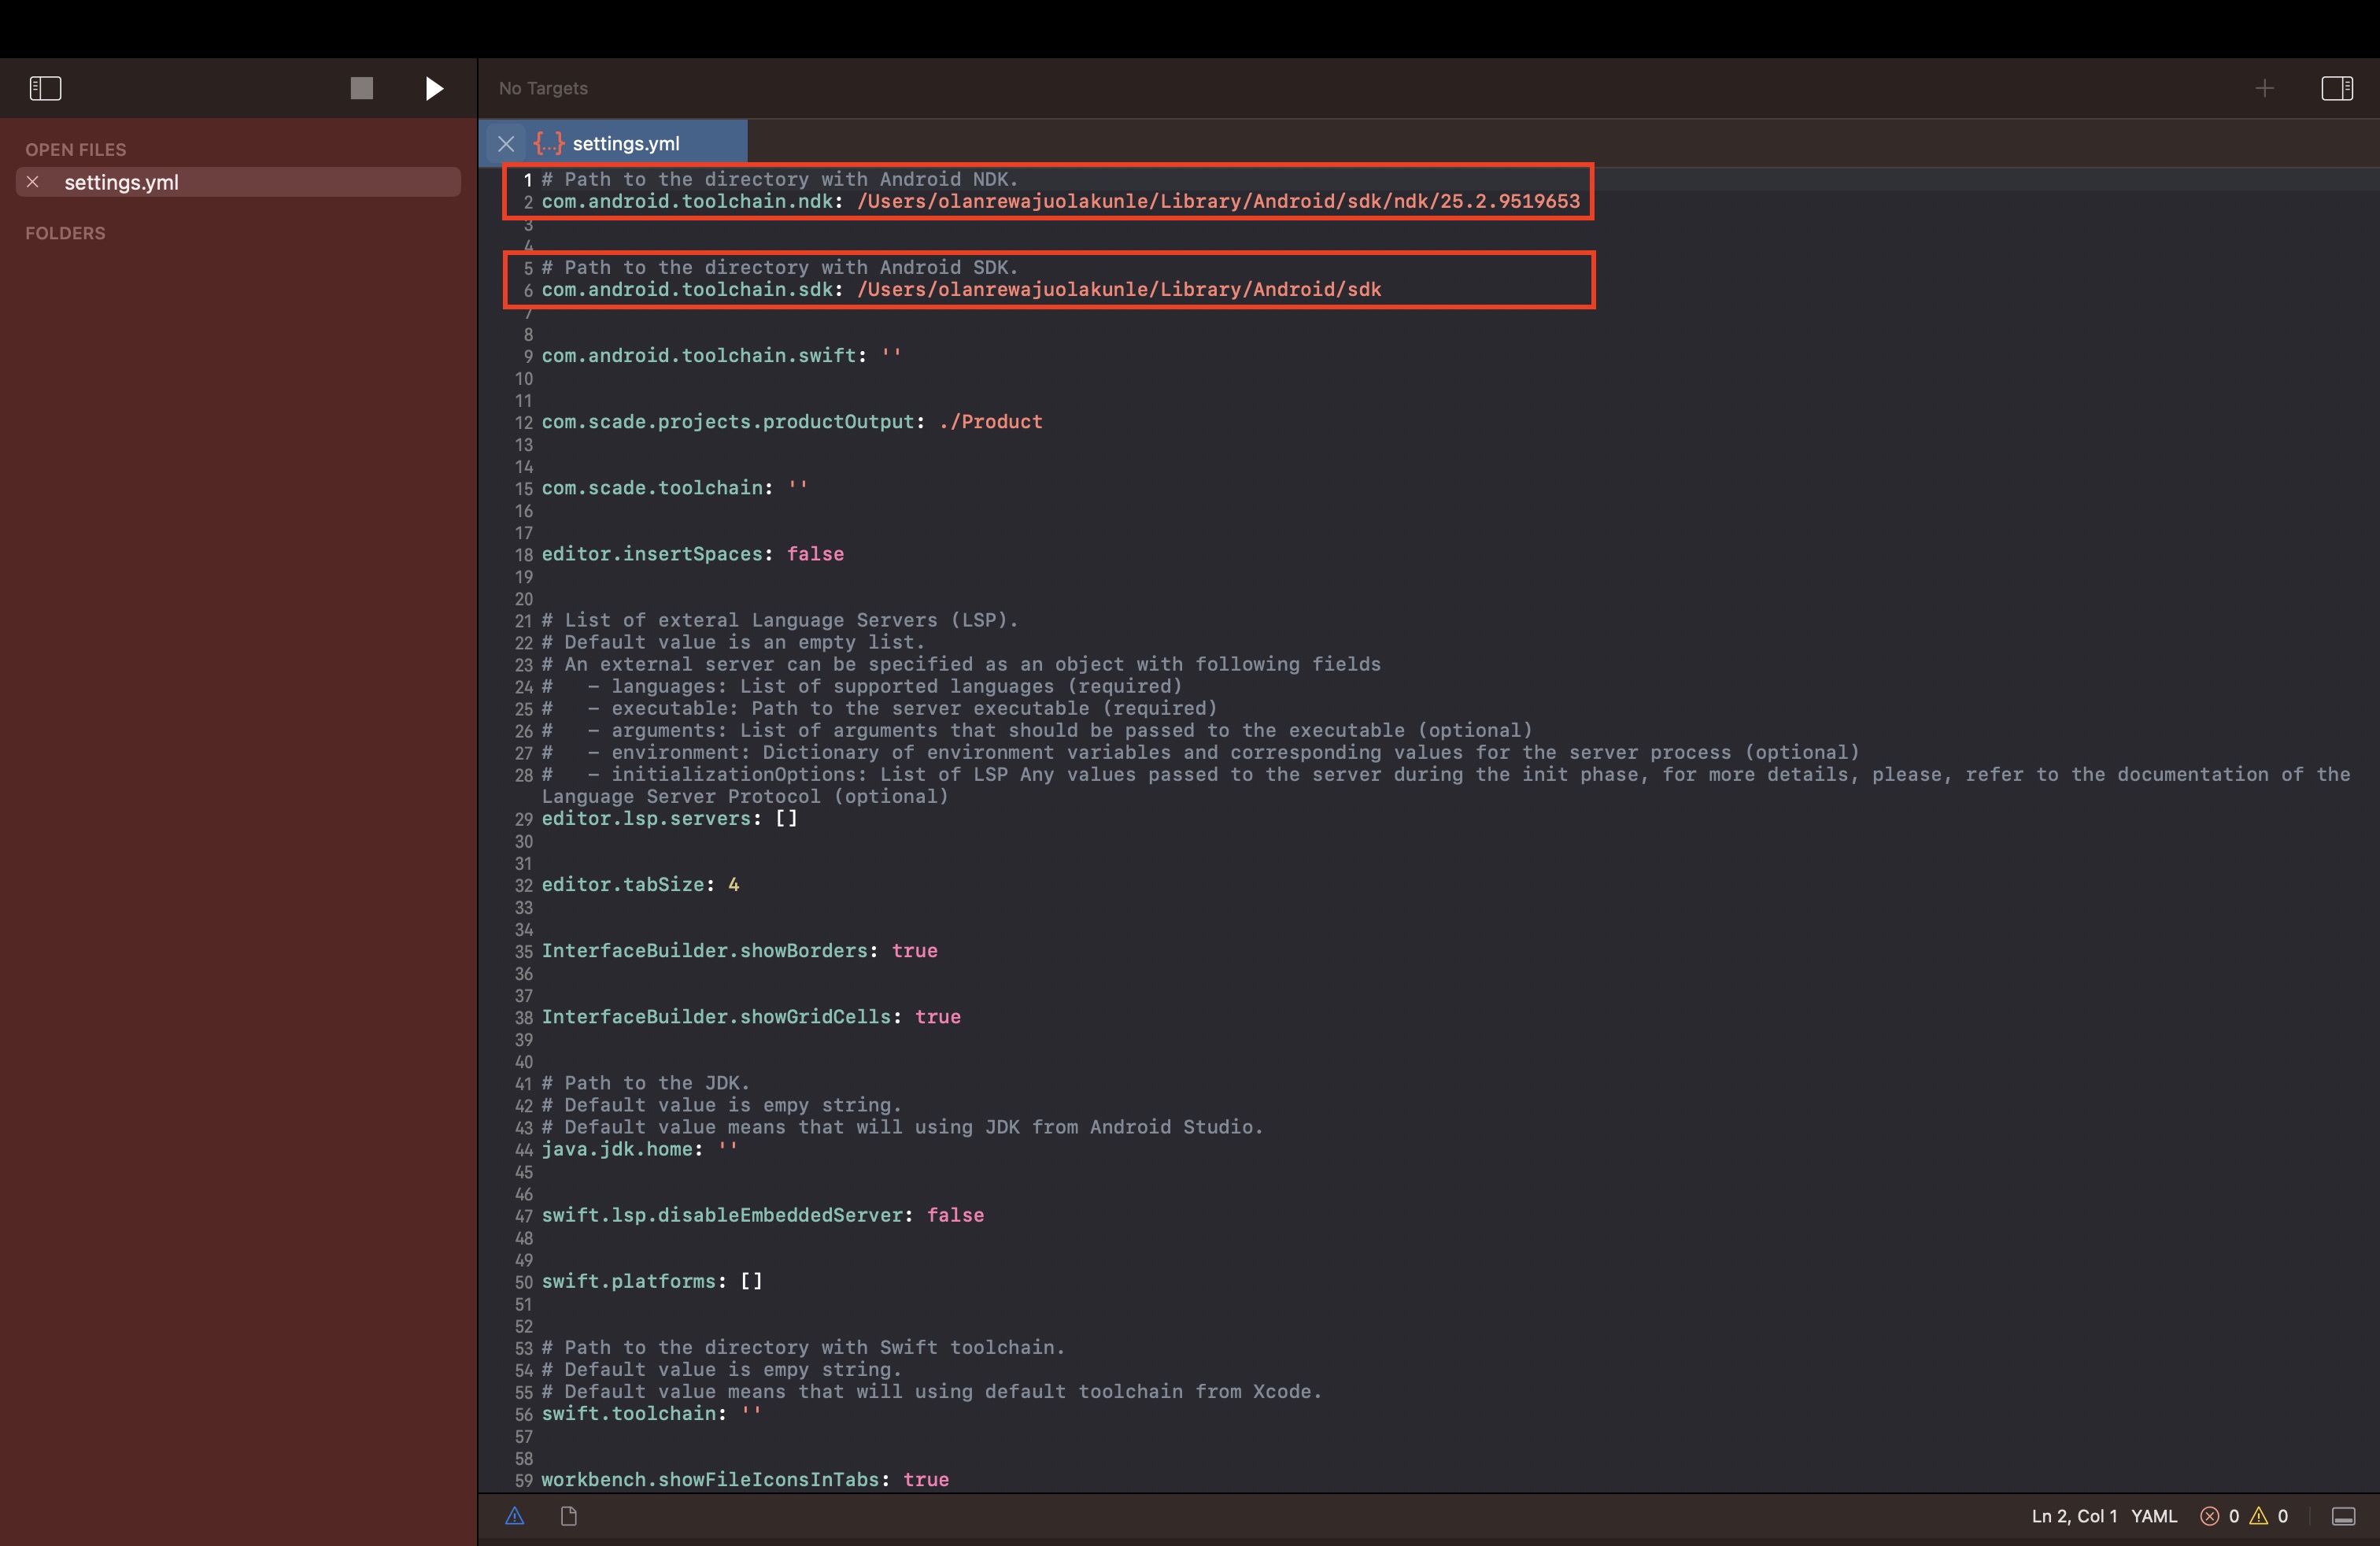
See also Settings.yaml
End of Installation
🎂 Congratulations. Now you are ready for Cross Platform App Development with Swift on iOS and Android
Updated 2 months ago